Deploying Binfer Behind Internet Information Services (IIS)
Important Note for IIS
When using IIS no client names can have spaces in them. Any client that has a space in their name will not be able to download an individual PC file.
Opening a Port
You will need to open a port on the server hosting IIS to allow Binfer Enterprise Sync to pass through. The port must be the same port that you installed the Binfer Enterprise Sync Server on. For help opening a port please review our opening a port documentation.
Prerequisites
This guide starts with the following assumptions:
- IIS is installed
- The port for Binfer Enterprise Sync is already open
You will also need the following information:
- The Binfer Enterprise Sync Server’s internal IP address
- The port that Binfer Enterprise Sync was installed on
- The domain name set in Private Cloud Settings
Installing IIS Extensions
If you already have Application Request Rerouting (ARR) and URL rewrites installed, you can skip to the next step. ARR is a Microsoft extension that allows users to easily create reverse proxy rules and URL writes supports the needed changes to the URL.
- On the machine running IIS, go to Microsoft’s ARR page and download ARR. Double click the downloaded installer to run it
- On the same machine, next go to Microsoft’s URL Rewrite page and download URL Rewrites. Double click the downloaded installer to run it
Setting Up the Reverse Proxy Rule
If you had the IIS Manager open during the previous step you will need to close and reopen the manager. This allows the interface to update with the new application that has been installed.
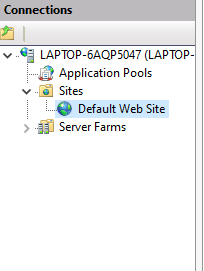
- On the left-hand side of the IIS Manager interface navigate to the site that the traffic will be passing through under the Sites In the example below this is Default Web Site.
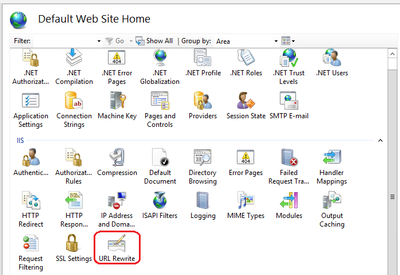
- In the IIS Features View that is displayed click on URL Rewrite
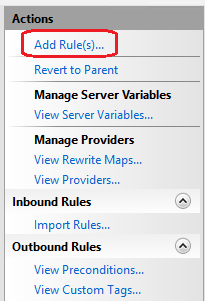
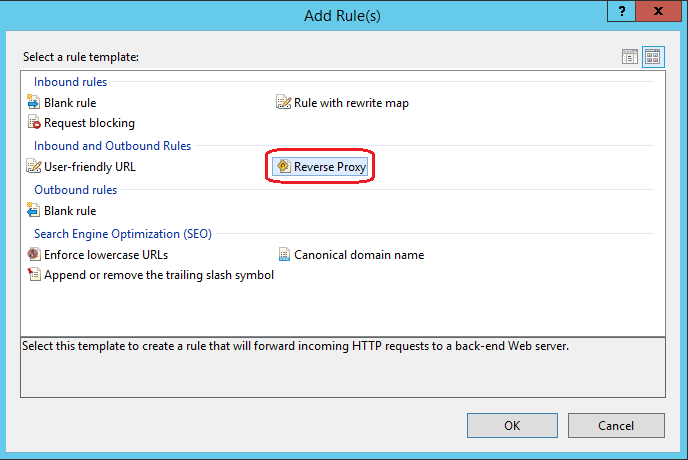
- Choose Add Rule(s)… from the Actions menu on the right-hand side of the screen
- In the popup window that comes up, select Reverse Proxy as your template found under the header Inbound and Outbound Rules
- On the Add Reverse Proxy Rules screen under Inbound Rules enter the IP of the machine followed by the port it was installed on as shown below
- NOTE: If IIS and Binfer are running on the same machine you can use the IP 127.0.01 as shown below
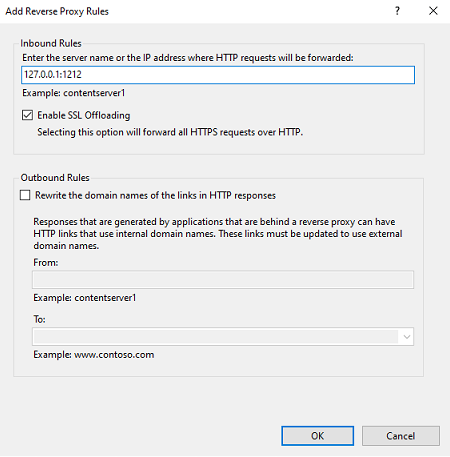
- Leave Enable SSL Offloading checked
- Press Ok to finalize the rule
Binding to Binfer Server’s Port
The final step is to bind your IIS reverse proxy to the port that Binfer Enterprise Sync was set up for, and the port that was opened on the firewall.
- Open the IIS manager and navigate to the site that the traffic will be passing through under the Sites In the example below this is Default Web Site.
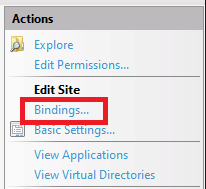
- On the right-hand side of the window under the Actions tab, select Bindings…
Ensure the following exist:
2. Binding to port 443 (https) exists to a valid certificate.
Running Binfer with HTTPS and SSL
If you are attempting to run Binfer Enterprise Sync’s Server behind a web server that uses HTTPS and SSL please follow the steps below to ensure all clients connect smoothly.
- In the Binfer Enterprise Sync web interface navigate to the Private Cloud module from the navigation menu on the left-hand side of the screen and select the Settings tab from the top menu
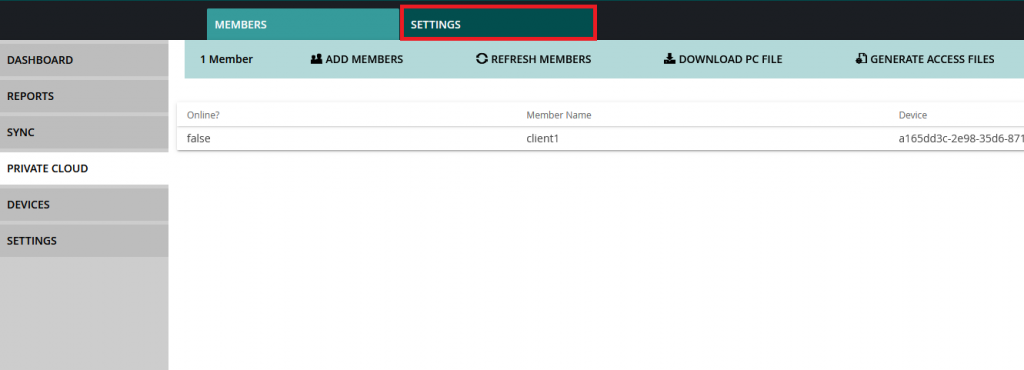
- At the bottom of the options enter the port you are accepting HTTPS connections on (usually 443) and check the box for Use HTTPS connections
NOTE: If you have not already done so, to enable HTTPS you must set the domain that matches your SSL certificate on this screen as shown in the image below
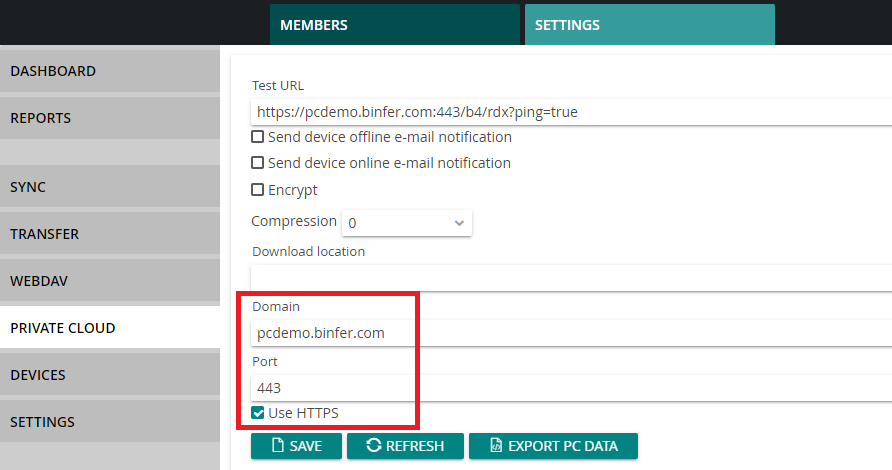
- Click the Save button to save the settings. Your test URL should regenerate with the proper port and protocol attached, check this to verify your changes were committed. Binfer Enterprise Sync is ready to operate over SSL!
NOTE: You will need to create new PC files for all of the clients in the Private Cloud.
Troubleshooting
If after following the above steps you still cannot access Binfer’s server please follow the steps below to attempt to troubleshoot the issue.
- On the machine Binfer Enterprise Sync is installed on, navigate to the admin console. You can achieve this by going to the address below in a web browser. You MUST replace {PORT} with the port Binfer Enterprise Sync’s Server was installed on.
http://localhost:{PORT}/adminIf the admin console login page does not come up, please send Binfer Enterprise Sync’s logs to your sales representative so that we can help you troubleshoot any installation issues. This log can be found at the path below where {SYSTEM_DIR} is the system path specified at install time.
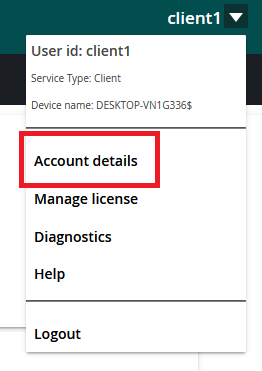
{SYSTEM_DIR}/Binfer/*.log- On the machine Binfer Enterprise Sync is installed on, navigate to the admin console. In the upper right-hand corner click the drop-down menu next to your user ID and select Account Details from the menu that pops up. On the screen that comes up you will see a field labeled internal IP. Ensure that this matches the IP of your machine. If it does not please follow our guide: Binfer Binding to Wrong Internal IP
- On the machine Binfer Enterprise Sync is installed on, navigate to the Windows Defender Firewall as outlined in the opening a port documentation. Ensure that the port Binfer Enterprise Sync is installed on has an open inbound and open outbound rule. If the port is not open in the firewall, follow the opening a port documentation linked above to open the ports properly.
- On the machine running the IIS server ensure that you can reach the Binfer Enteprise Sync server by navigating to the address below in any browser. You MUST replace {IP} with the internal IP of the machine hosting Binfer Enterprise Sync’s Server and you MUST replace {PORT} with the port Binfer Enterprise Sync’s Server was installed on.
http://{IP}:{PORT}/adminIf the admin console login page does not come up, please ensure that the firewall was configured properly or contact your Binfer sales representative for more assistance. The machine running IIS and the machine running Binfer Enterprise Sync’s server MUST be on the same network.
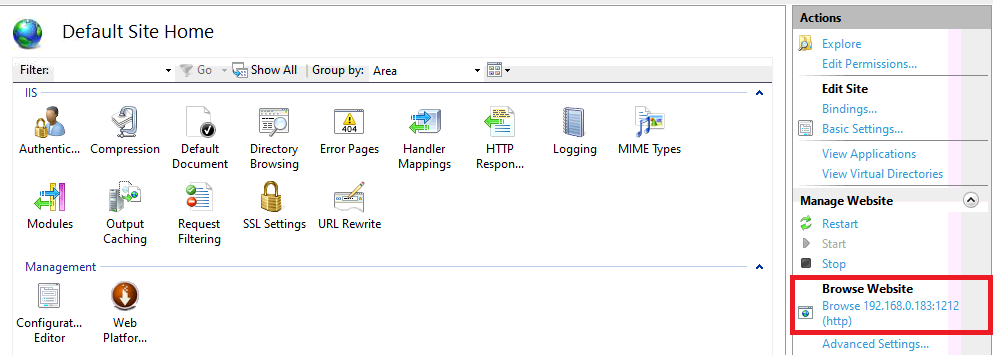
Finally, ensure that IIS was set up correctly by browsing the website through IIS. This can be done from the IIS Manager. Navigate to the site traffic will be passing through as outlined in step 1 of Setting Up the Reverse Proxy Rule above. From there, select browse {site address} on the right-hand side of the screen under Browse Website as shown below. This should once again bring up the Binfer Enterprise Sync login page. If it does not, please review your IIS configuration with the steps above.
NOTE: In some cases, when IIS has previously been configured and Binfer is being added into the setup, the reverse proxy rule needs to be configured differently to work with the previous setup. If no other troubleshooting has resolved your issue, please try redoing the Setting Up the Reverse Proxy Rule section above but do not check the box labeled Rewrite the domain names of links in HTTP responses. You will need to delete the previously configured rule before redoing this step.