Server Installation
Server Pre-Requisites
- The IT Admin should have access to the “binfer-service.exe” installer and the server where it is being installed.
- If any other Binfer software applications have been installed on your server in the past, ensure those applications have been completely closed out and uninstalled before proceeding.
- Make sure that all the firewall settings are setup for the server before you proceed to server installation.
Server Installation Walkthrough
- Ensure that Pre-Requisite steps have been completed.
- Right click on the “binfer-service.exe” installer and select “Run as Administrator”.
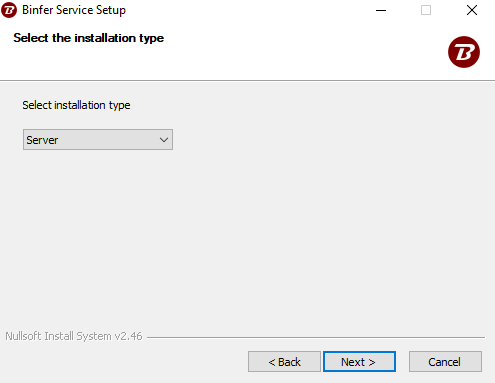
- Select the Installation type “Server” and then click “Next”.
4. Enter the setup details and click “Next”
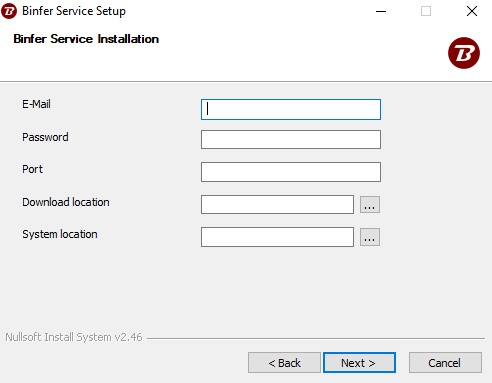
a. E-mail
Licensed account email ID which was provided by your Binfer rep.
b. Password
Binfer account password which was provided by your Binfer rep.
NOTE: Your password can be changed once Binfer is installed on the server.
c. Port
Select any port that is available on the computer. Typically between 1024 to 49151. Chose 1212 if available.
This port is used to access the Admin console and to transfer data.
NOTE: This should be a valid port that is open in the firewall and outside of dynamic port range (49152 to 65535). Port must be opened both on the local and the router/network firewalls.
d. Download Location
Specify the default location where the files received will be downloaded
to.
NOTE: When entering the path, ensure there are no spaces. The path used should be accessible to the admin. We recommend using an empty folder.
e. System Location
Specify the location where the database and system files will be stored. NOTE: When entering the path, ensure there are no spaces. The path used should be accessible to the admin. We recommend using an empty folder that is different than your download location.
5. Enter the location where Binfer Enterprise Sync should be installed.
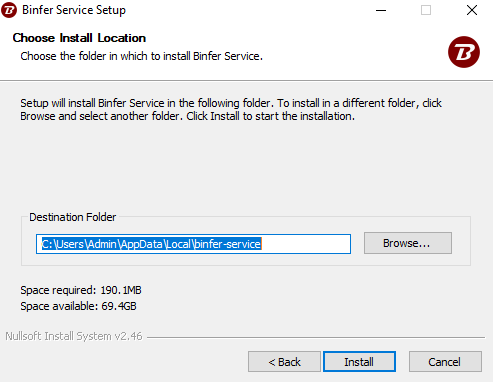
6. Click the “Finish” button to complete the installation process.
7. Verify installation
a. On the server, open your “services.msc” (Press windows key + R to open the run application, type “service.msc”, and press enter) and verify that “BinferService” (aka Binfer Enterprise Sync) is installed, has a status of “Running”, and has an “Automatic” startup type.
![]()
Note: If your Binfer server did not start, Please check for the log files present at following locations and follow error codes help section.
BINFER_SERVICE/logs/*.log,*.txt – This would be the logs folder wherever Binfer Enterprise Sync was installed during step 5 of the installation process.
SYSTEM_FOLDER/Binfer/*.log,*.txt – This would be the system folder specified in step 4e of the installation process.
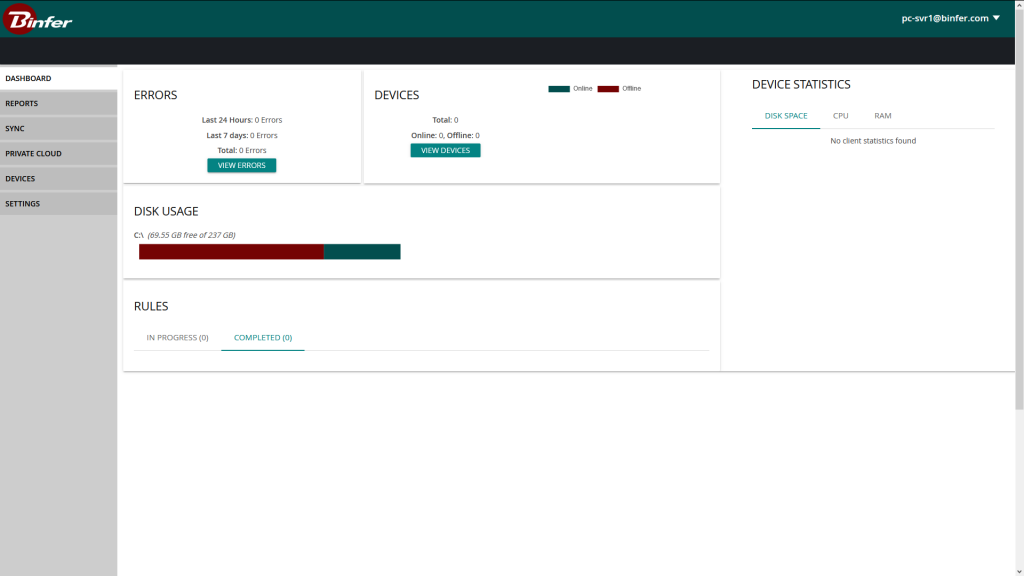
- Login to Admin console.
a. Open the Binfer Web Admin by opening a browser and typing http://localhost:{Port}/admin. Login by entering the PC Server credentials and clicking “LOGIN”. You must replace “{Port}” in the link with the port number entered in step 4c.

Note: If you are unable to load the login page your Binfer service did not start. Please check log files for error codes. Log file location and details are specified in the note in Step 7.
b. If you see the admin dashboard, you have logged in successfully.